Bob WeisharThings I wish I knew when I became a founder: Product ExecutionA founder’s guide to creating products people loveJan 4, 2023Jan 4, 2023
Bob WeisharThings I wish I knew when I became a founder: Product DiscoveryA founder’s guide to creating products people loveDec 30, 2022Dec 30, 2022
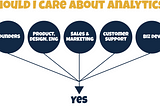
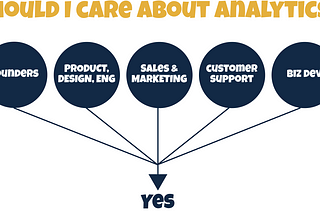
Bob WeisharThings I wish I knew when I became a founder: AnalyticsIn this series, I’ll share things I wish I knew when I first started my company.Dec 21, 2022Dec 21, 2022